
Let’s learn how to fold this traditional origami butterfly, one of the classic models in origami, and a great project if you’re just starting out or want a quick, satisfying fold. It doesn’t require a lot of steps, but that clever “pull the corners out” move in the middle gives it a nice bit of challenge and makes the final shape click into place in a really satisfying way.
Below, you’ll find images with step-by-step instructions to guide you through the fold, along with some tips to help the model come out clean.
How to Fold This Easy Traditional Origami Butterfly
Paper I Used
For this model, I used washi pattern origami paper by Tuttle Publishing, sized 10 x 10 cm.
Any standard origami paper in any size will work just as well, just keep in mind that patterned paper on one side will make the model more visually interesting once is folded.
How to Fold It:
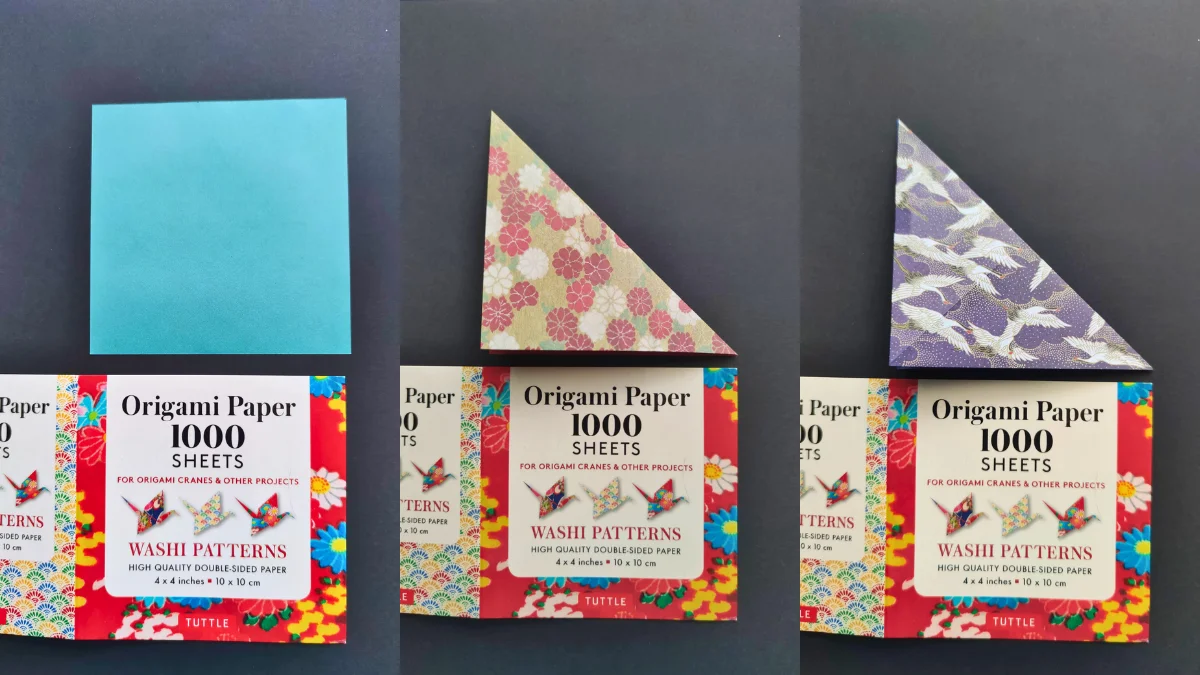
Start with a square piece of paper. Fold the first diagonal, unfold, then fold the other diagonal and unfold again.
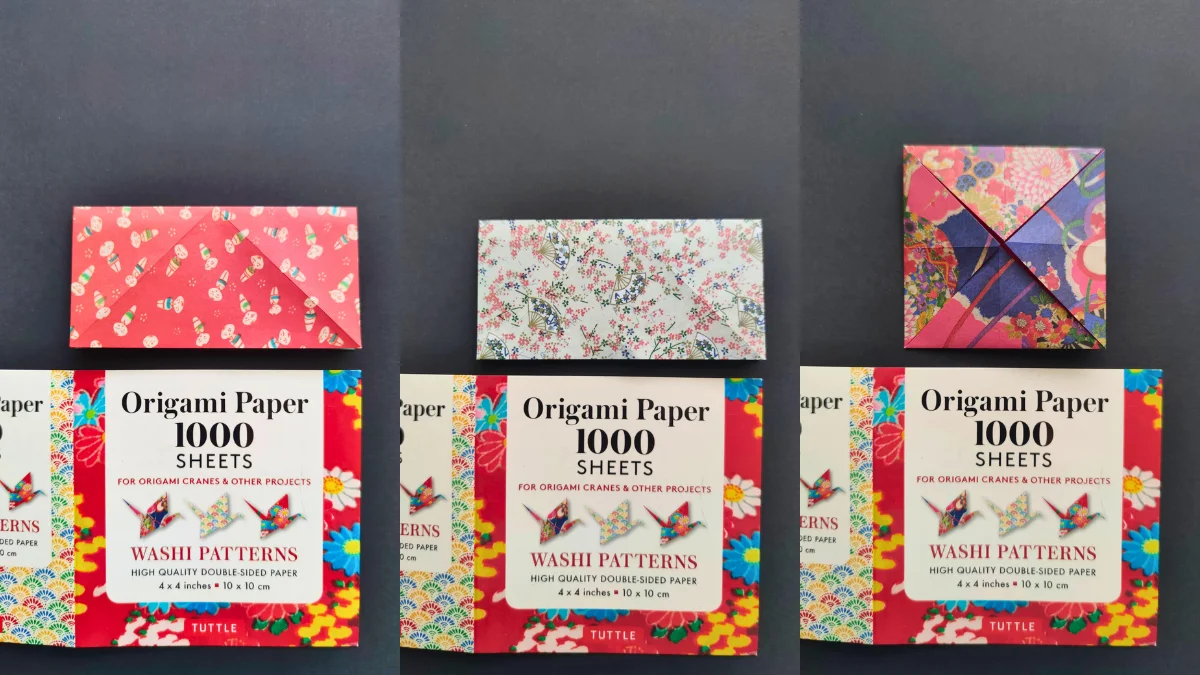
Fold the paper in half, unfold, then fold it in half the other way and unfold again. At this point, you should have a paper with both diagonal and both horizontal/vertical creases visible.
Now fold all four corners in to the center of the paper.
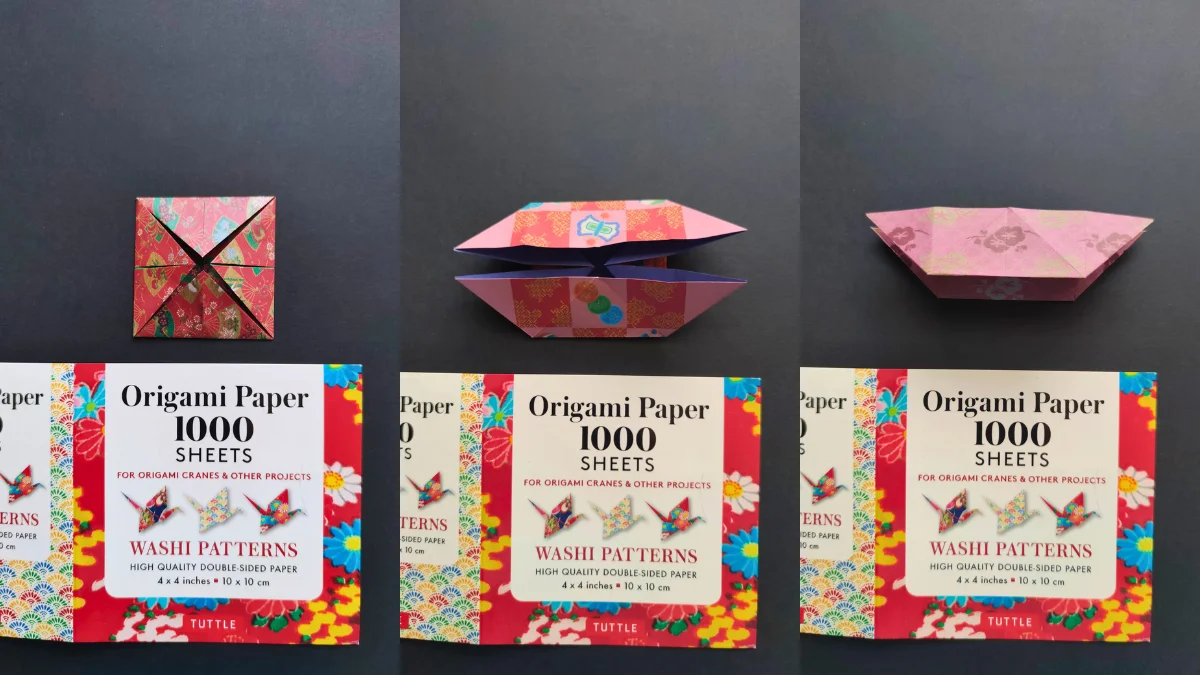
Fold the corners in to the center one more time. Your paper should now be a smaller square, with the original corners tucked away in layers.
Now for the tricky part: with the model folded like this, we need to pull the corners out from inside the model. Open the model up slightly so you can see the corners tucked inside, then carefully pull them outward to get the shape shown in the center image.
Don’t worry if it takes a couple of tries to get this right, it’s the trickiest step in the whole process.
Fold the model in half, with the opening at the top.
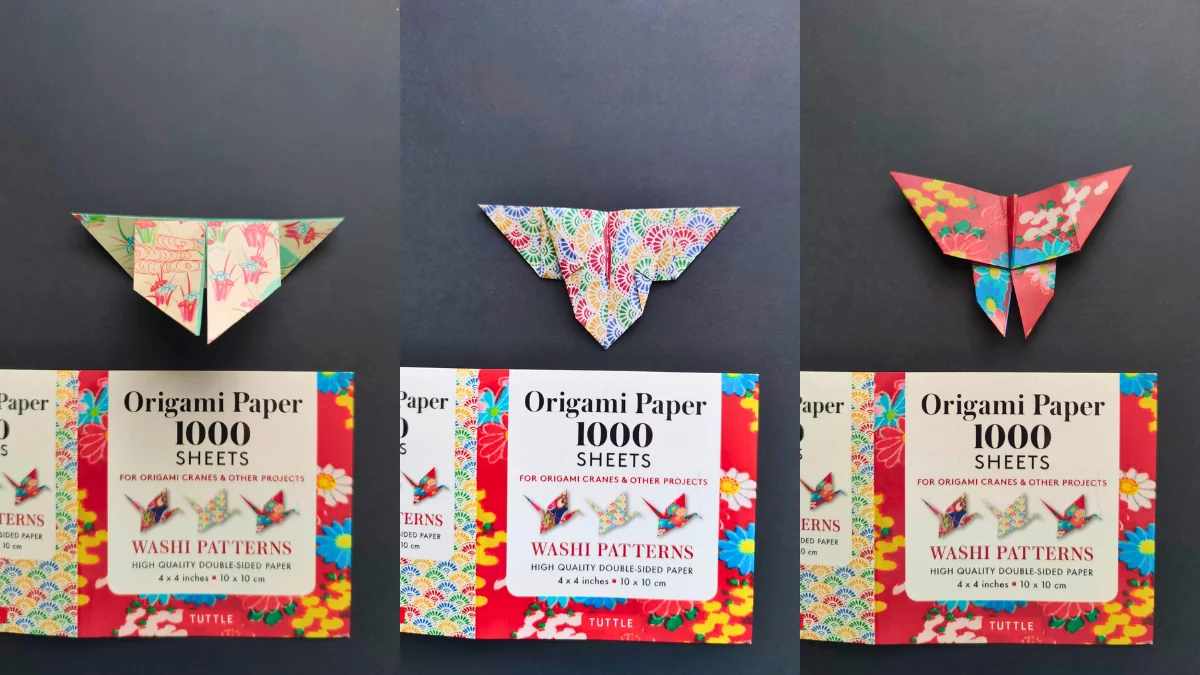
Take the first layer, the left and right corners, and fold them downward.
To shape the bottom flaps, fold in the left and right sides of the first layer of paper. At the top, you’ll want a sharp corner, but at the bottom, you can adjust the fold as much or as little as you like, depending on how wide you want the wings to appear.
Turn the model over and fold it in half. Take one side of the butterfly and fold it back up, leaving some space for the body, as shown in the image.
Repeat on the other side, so the tips of the wings meet.
Displaying Your Butterfly
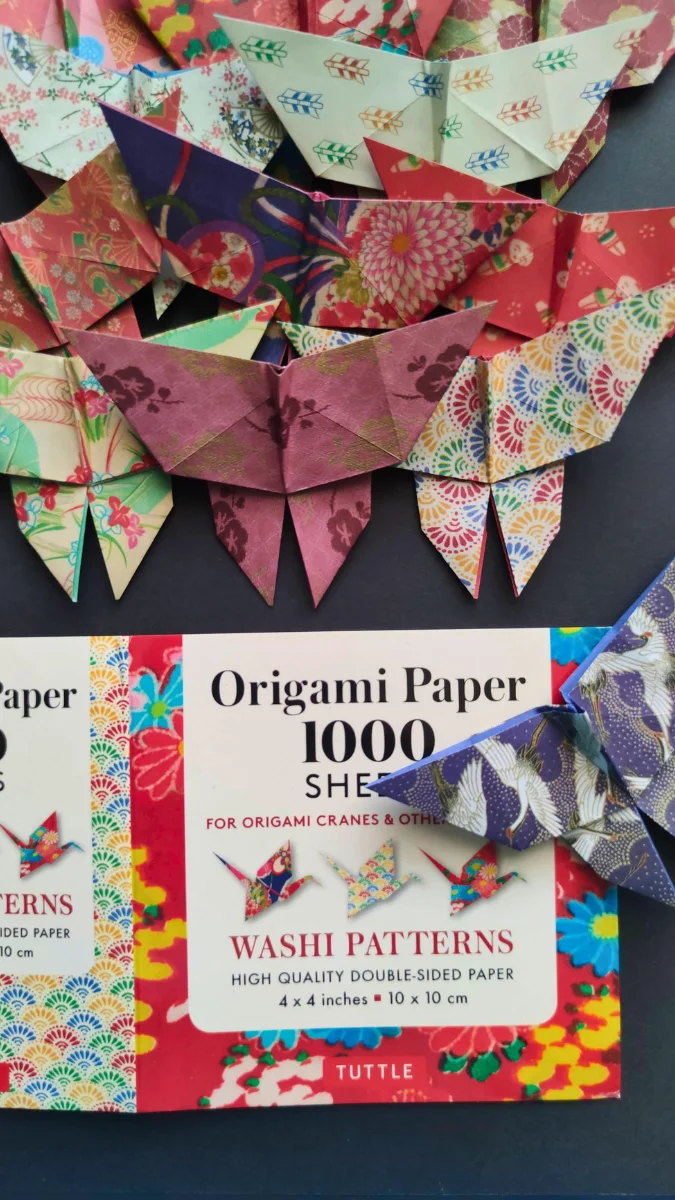
Once folded, these little butterflies look great in clusters, try folding a handful in different colors and patterns and grouping them together on a shadow box, greeting card, or even as a decorative accent on a gift.
Because the model holds its shape well, it also works nicely as a standalone piece on a shelf or desk.